Your Perfect Cup of Hot Chocolate

These cooler temps and all things holiday season have really been getting me in a festive mood!

Growing up, my mom’s homemade hot chocolate mix was always something I looked forward to. Now that I have a home of my own, I love finding ways to incorporate that tradition into my little family!

This year, we opted to add out hot chocolate to our coffee bar! From now until the end of winter, if you stop by we’ll have all the options for your hot chocolate drinking pleasure!

Every good hot chocolate bar starts with good hot chocolate! Three of my favorites from Target are the Swiss Miss packets, Good & Gather Double Hot Chocolate, and since I’m slightly lactose intolerant, I always like to have a dairy free option on hand like this Swiss Miss Non-Dairy mix!

In my mind, the perfect cup of hot chocolate has lots of marshmallows. The more the better! I found these vanilla star and Christmas tree shaped ones along with the peppermint flavored ones on the Holiday section at my local Target. Both are by Wondershop and so yummy! I may have eaten a few of the peppermint ones just by themselves…

Before I found the peppermint marshmallows, I used to sometimes stir my hot chocolate with a candy cane to get that pepperminty flavor. Something about the chocolate and mint combination just gets me! This crushed peppermint shaker is perfect and so cute to sprinkle on top of a peak of whipped cream.

If you’re looking to have single serve and individually wrapped options on hand, these Hot Cocoa Stir Spoons from Wondershop are perfect for you! I picked up a few for my hot chocolate bar as well as to give along with gifts at Christmas!

What are you hot chocolate must haves?

XOXO,
Leah

Parmesan and Cheddar Crisps

Happy Monday, y’all!

After several weeks of computer issues, I think I’ve finally gotten it back up and running (fingers crossed)!

Especially in the summer, I love a good crunchy and salty snack to go with a nice cold drink! Popcorn, chips, pretzels, you name it!

With my love of cheese, my latest addiction has been really any kind of cheese crisp, but buying them can get a little on the pricey side. Enter this recipe I whipped up one night, and boom! An easy and way cheaper version of my most craved snack!

What You’ll Need

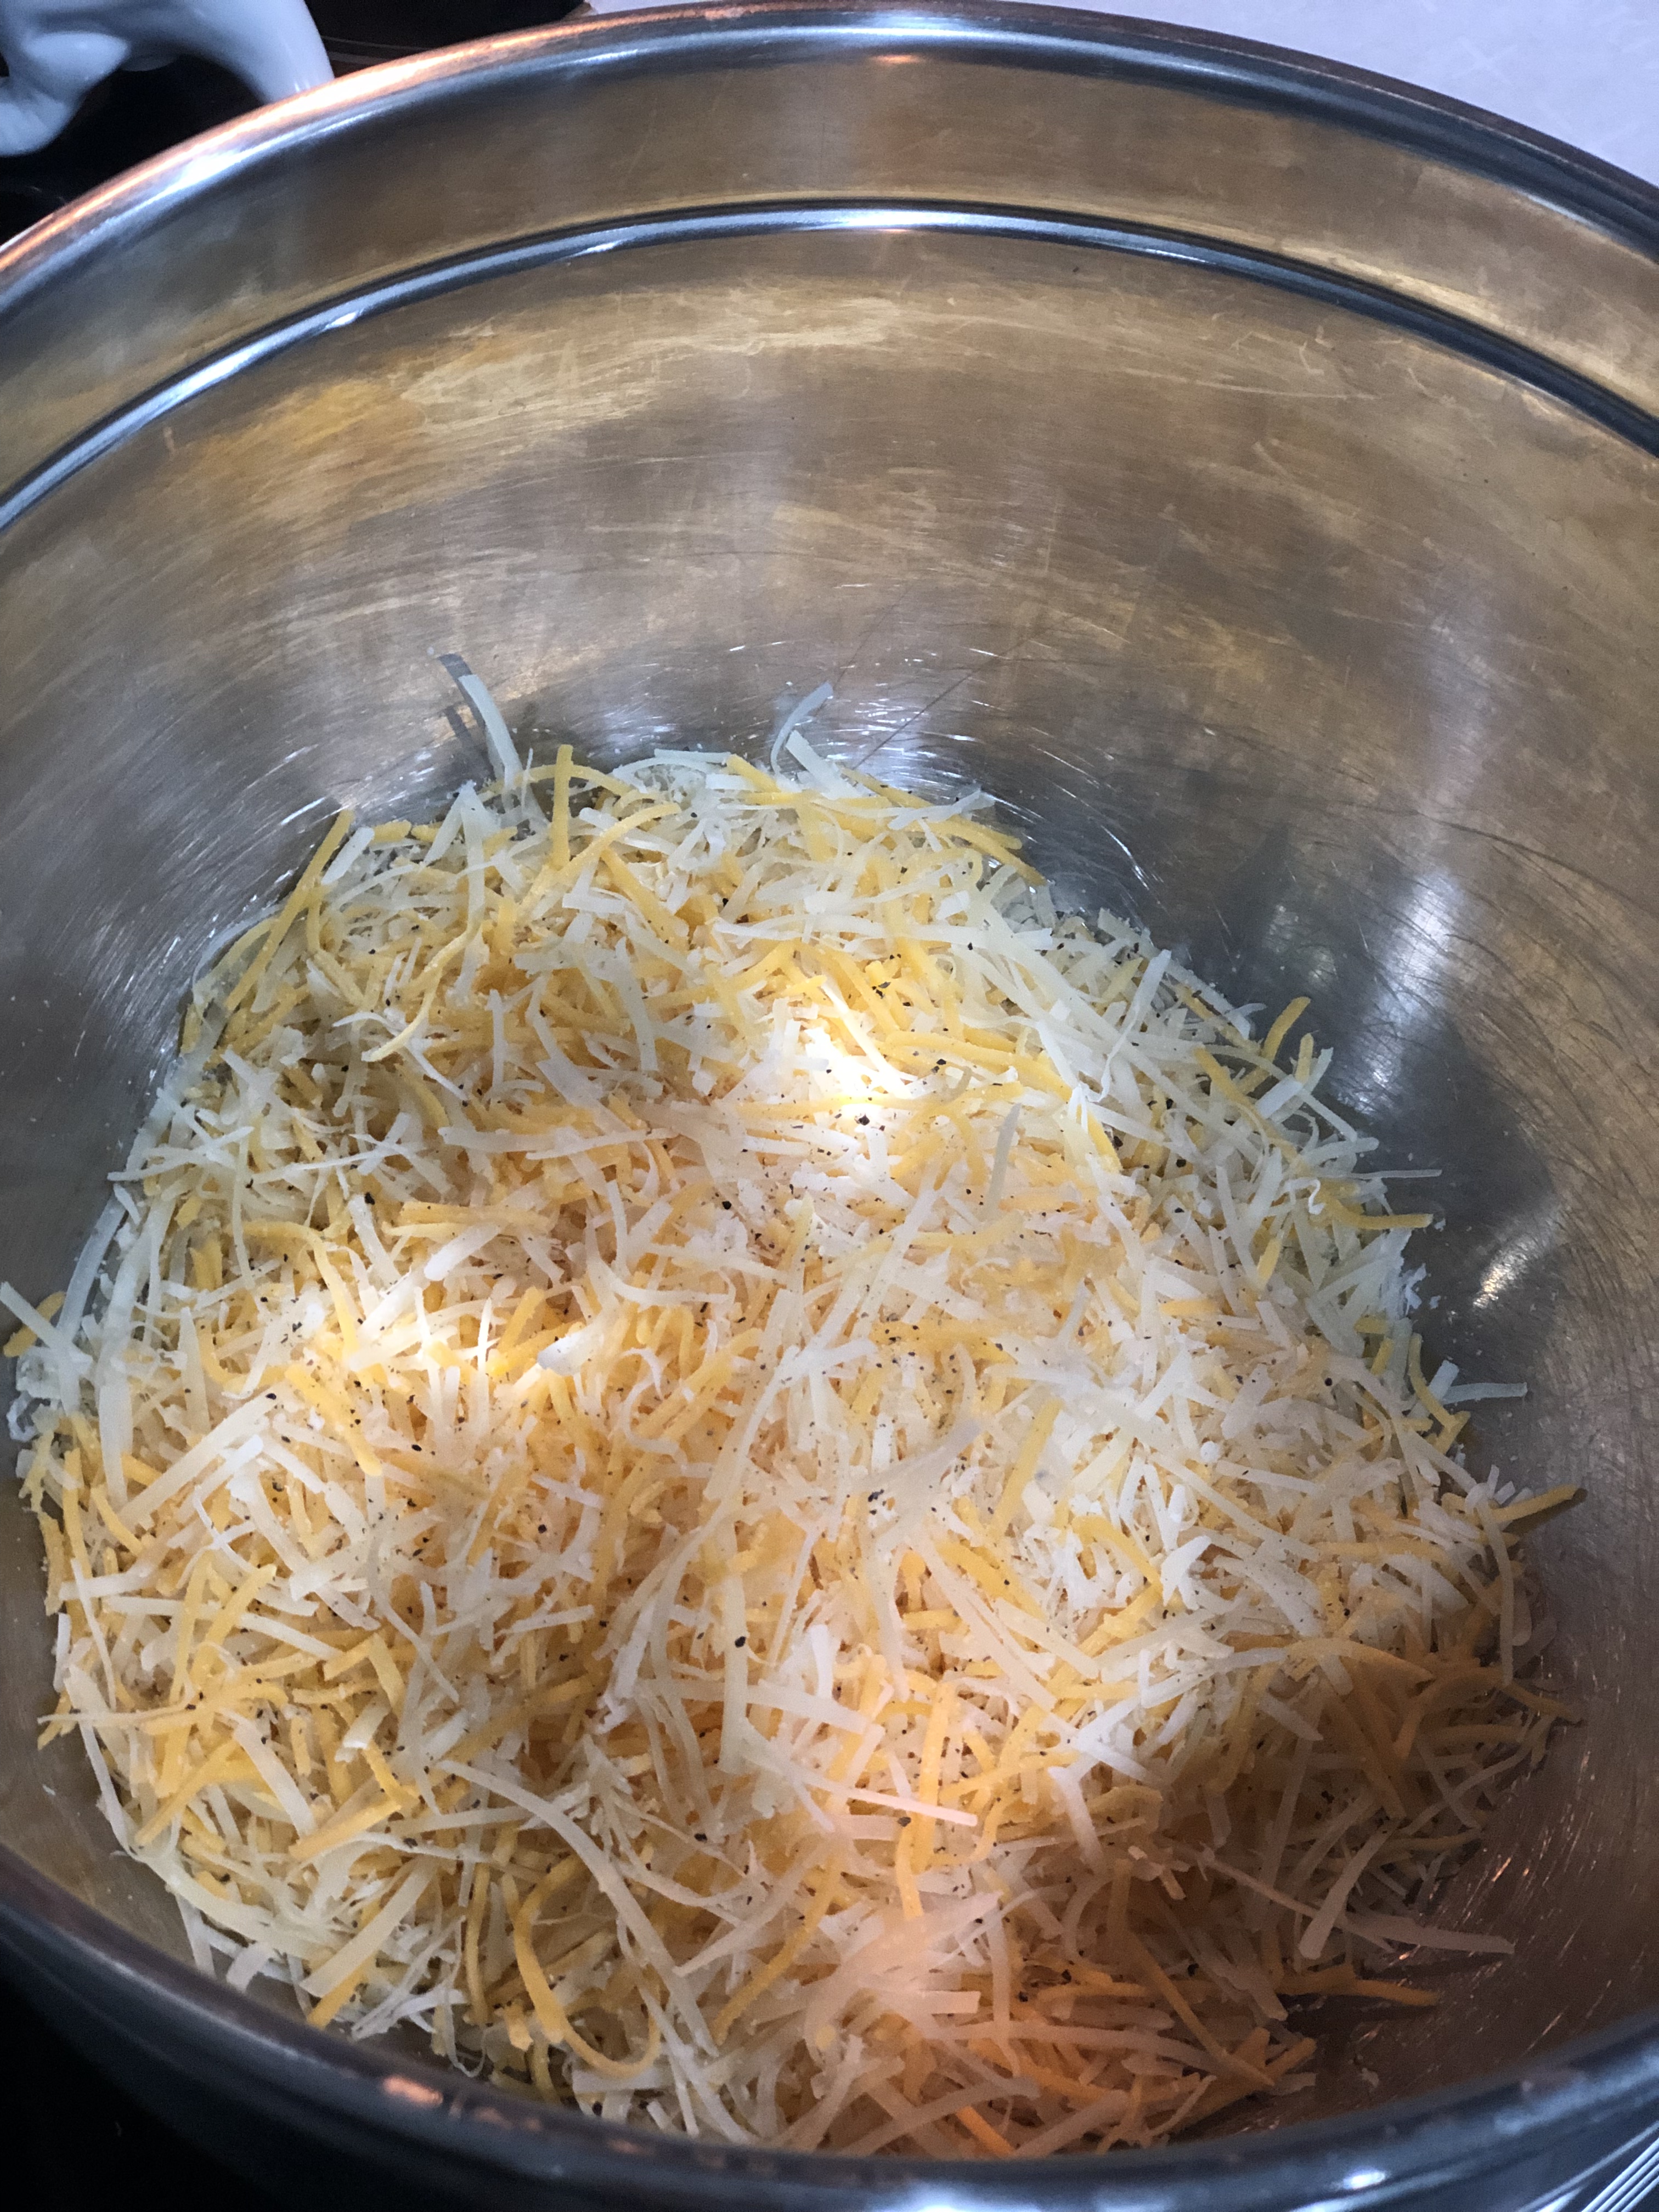
• 2 Cups Shredded Parmesan Cheese
• ½ Cup Shredded Mild Cheddar Cheese
• Salt and Pepper to Taste
• Parchment Paper

img_3767

You’ll want to preheat your oven to 350°.

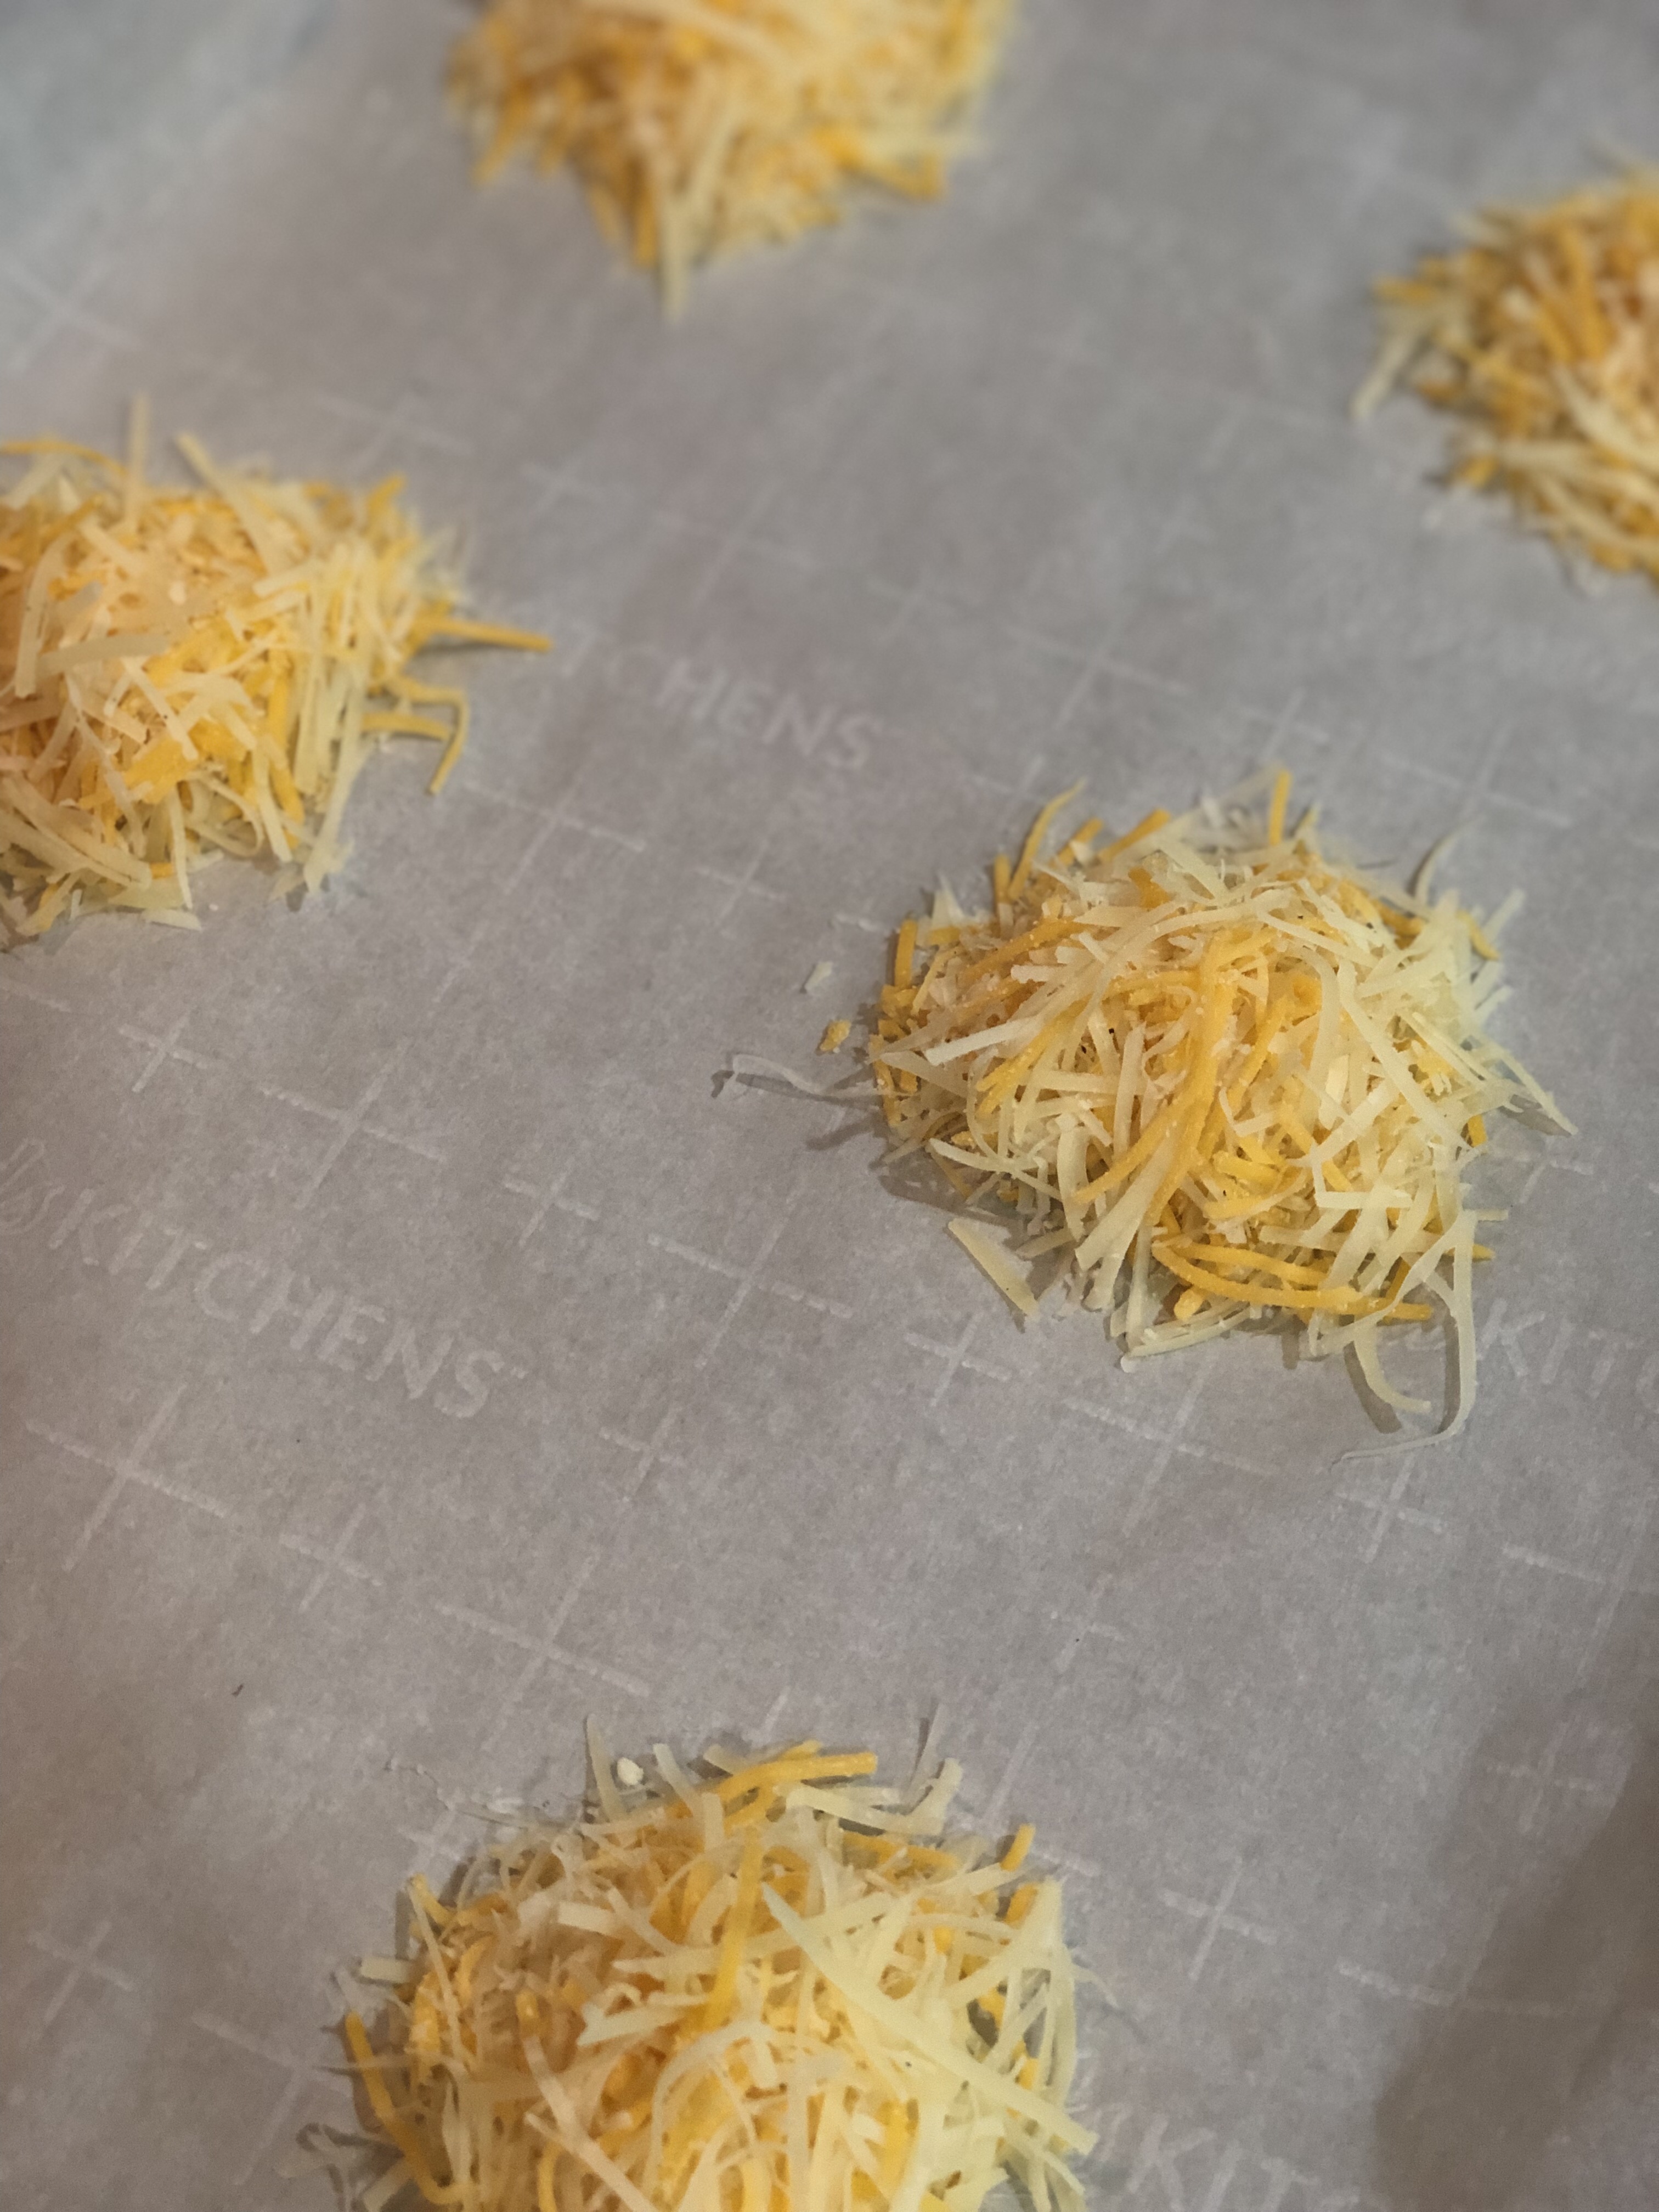
Next you’re going to line your baking sheet with parchment paper. This will help your crisps not stick and make clean up that much easier!

In a bowl, mix the two shredded cheese s together until well combined.

img_3768

Now you’ll drop heaping tablespoons of the mixture onto the parchment paper lined baking sheet. They don’t spread out too much when in the oven, so I put four mounds in each row.

img_3769

Bake in the oven for about 15 minutes until golden brown. Season with salt and pepper right after you take them out of the oven so the seasoning sticks best!

Let sit until cool to the touch and then you’re all set to enjoy your homemade Parmesan and cheddar crisps!

img_3771

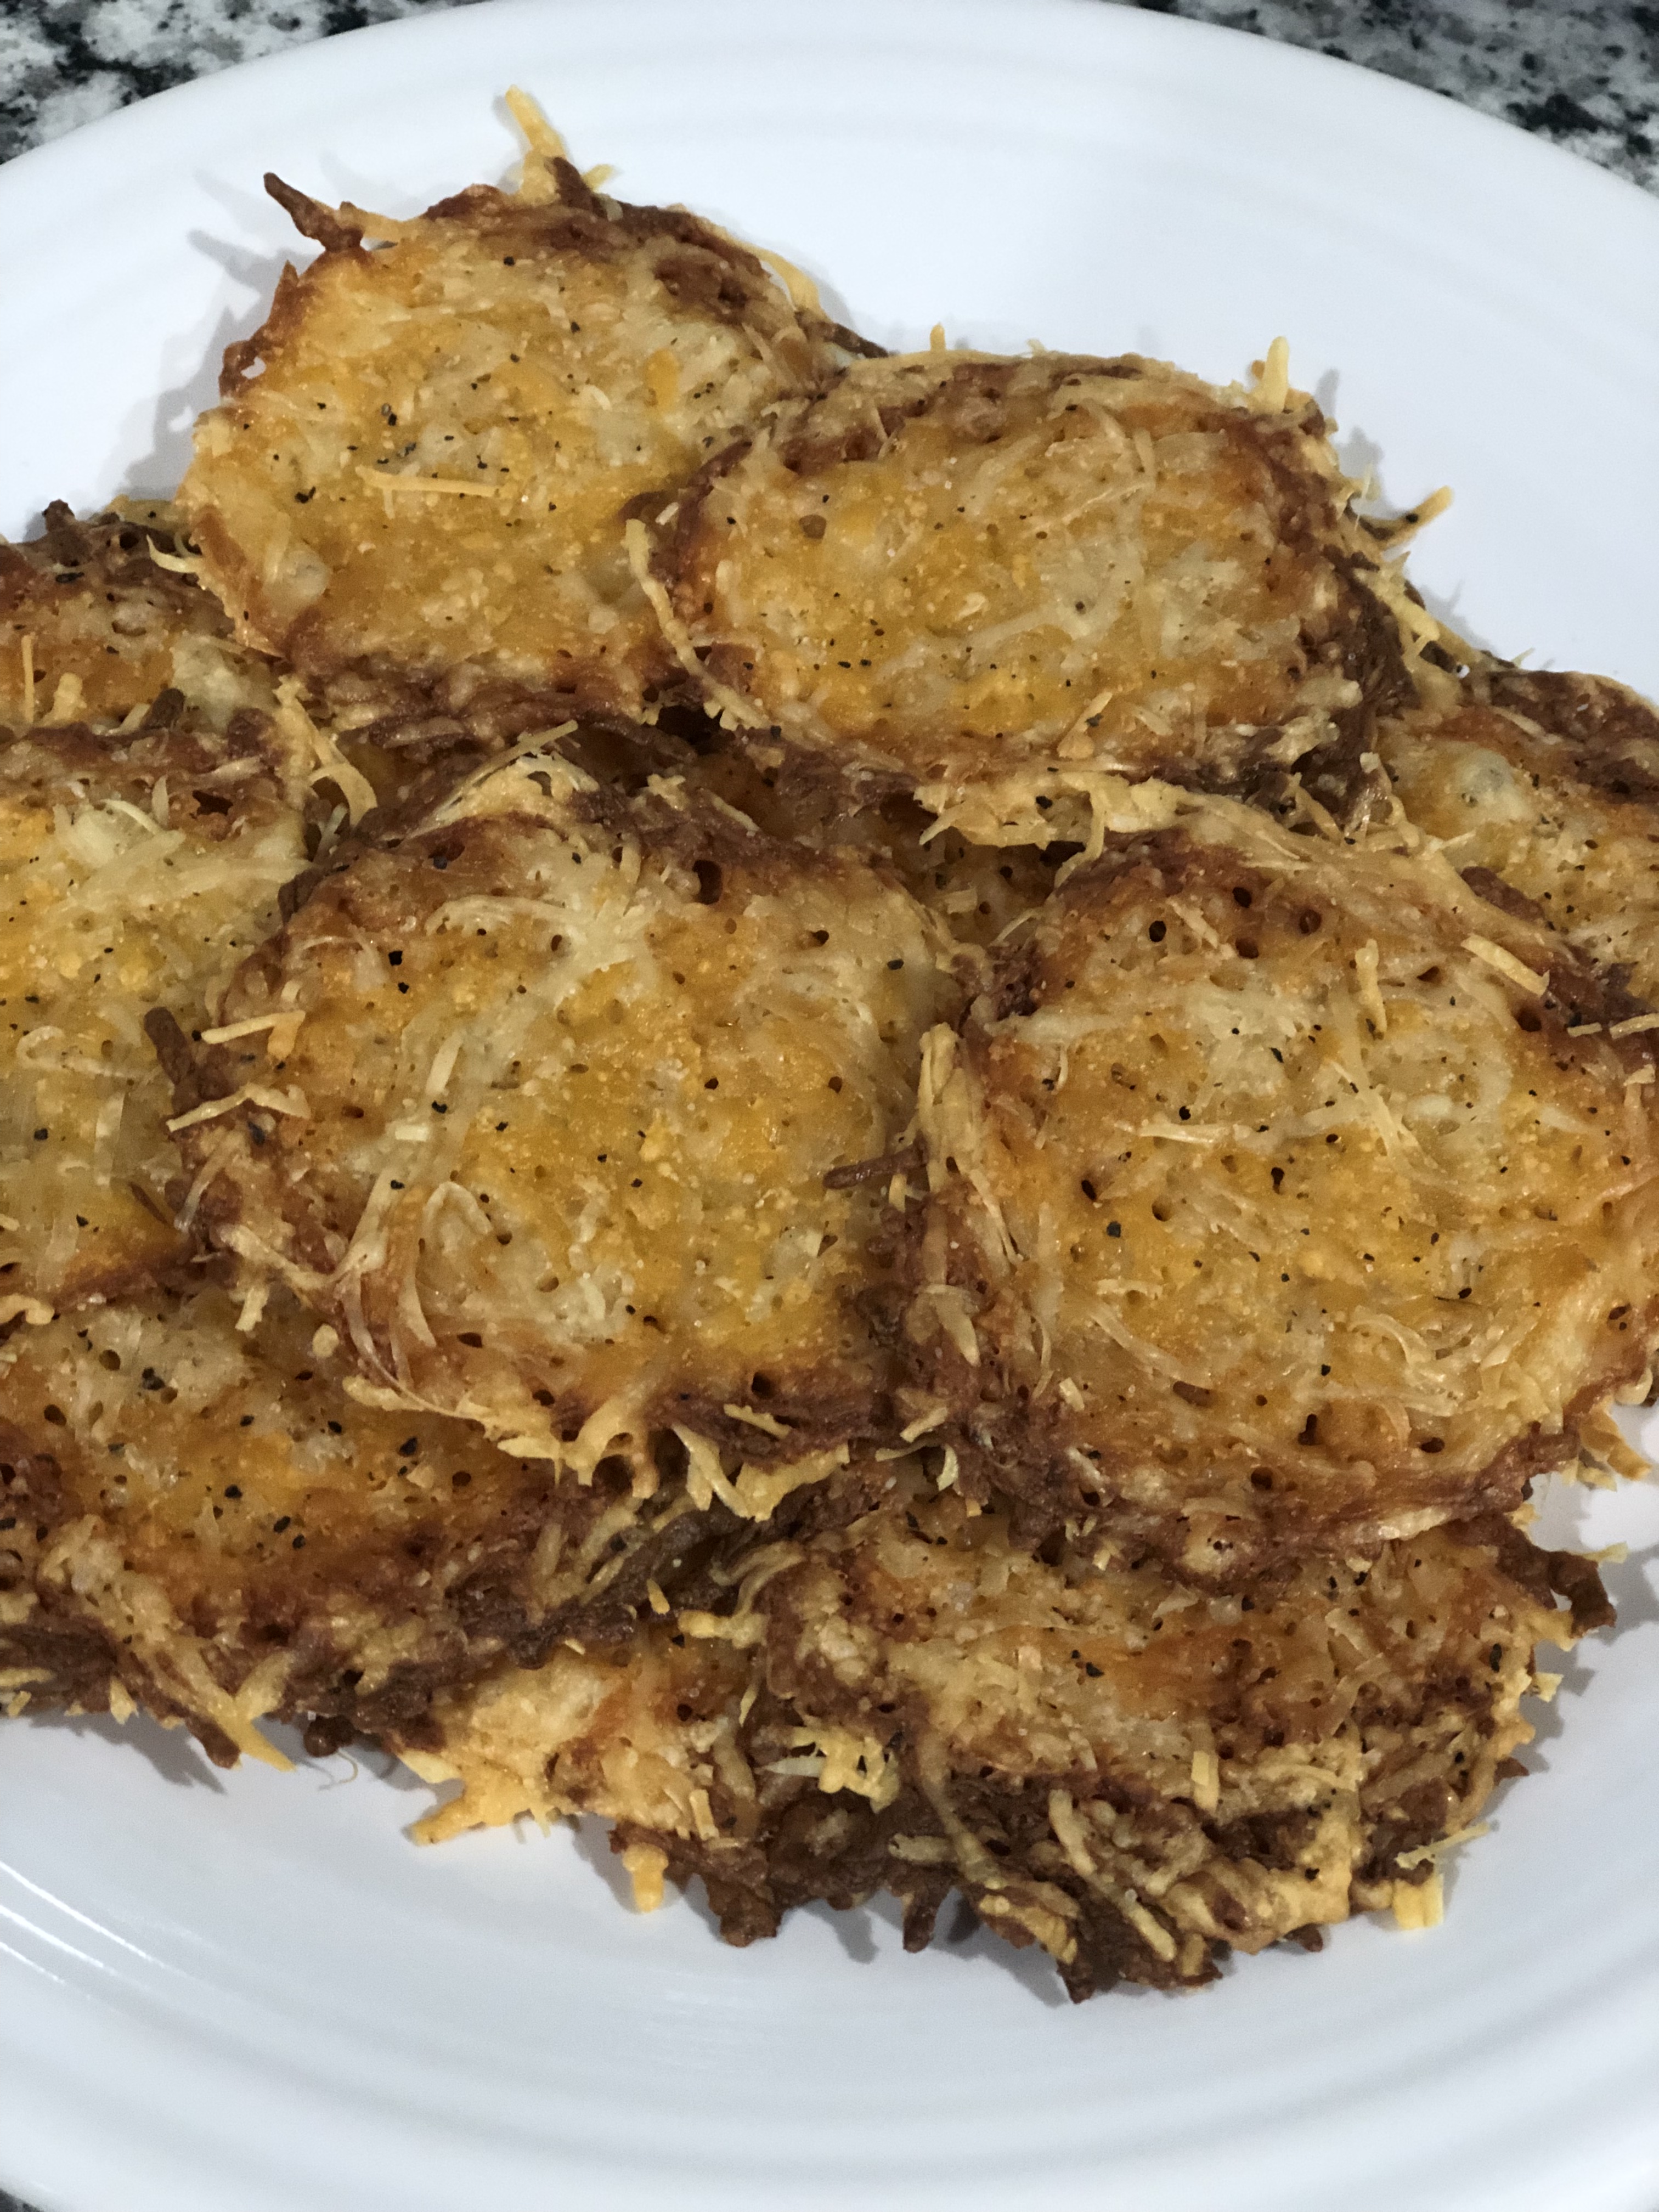
While yummy on their own, there are also tons of ways to jazz them up; turkey and avocado, in place of tortilla chips for nachos, with eggs and bacon…

What’s your go to snack right now?

XOXO,
Leah

Lemon Crinkle Cookies

I have such a big sweet tooth; candy, cake, ice cream, you name it! My husband on the other hand is a little pickier when it comes to the ones he likes. While I will eat pretty much any kind of sweet, he would much rather have something that’s light and not quite so sugary sweet tasting.

Enter these cookies that he had months ago, and I knew I had to figure out how to make them for myself! After much trial and error to get the texture just right, I have a new go to cookie recipe that we both can enjoy!

What You’ll Need

• 1 Box of Lemon Cake Mix
• 1 Egg
• 1 8 oz tub of Cool Whip
• About 1/2 Cup of Powdered Sugar

img_3437

Like always, you’ll want to start by preheating your oven to 350°F and having your baking tray ready to go. I lined mine with a silicone baking mat to help prevent sticking, but parchment paper would work too!

Next you’ll combine your cake mix, egg, and Cool Whip in a bowl. Mix all of this together until it’s well combined. The mixture may seem lighter and a little fluffier than normal cookie doughs, but that’s how it’s supposed to be!

img_3438

img_3439

Next you’ll take two spoons and a portion at a time, coat the dough in the powder sugar before placing on your baking tray. Once your tray is full, you’ll put them in the oven to bake for about 10 minutes! Repeat this step until all of your cookie dough has been baked.

img_3440

Allow cookies to cool on the tray for a minute or two before moving them to a wire rack to fully cool. Once all of your cookies have been baked, enjoy!

img_3441

XOXO,
Leah

Warning: In my experience, it is impossible to eat just one!